
7 Appendix: Exercises | The Changing Story
Linda Buturian
Exercises
1. Connecting students’ interests and experiences to course themes in
order to create relevant digital stories
Exercise 1.1
Freewriting, sharing, and providing feedback
In the first week of the semester I present students with one or two writing prompts that are comfortable for students to write about, and also connect to the
course topic.
For instance, in the water seminar, I’ve had students write about an experience they’ve had that involves water—this could be a family fishing trip, a moment walking down the street and forgetting about time while splashing in a puddle, or helping their school lay out sandbags in preparation for a nearby river to flood. Before students begin writing I clarify this is not graded
but will be worth participation points, and they will be sharing them with classmates.
I ask students to describe a true story of an experience that’s happened to them. It can be happy, dark, funny, quiet, sad, simple, dramatic, or some combination of these. I encourage them to write in their own voice, usher in the five senses and descriptive detail, and I review the different perspectives (i.e., first, second, third) and suggest incorporating dialogue. I give them about 20 minutes and alert them when they have five minutes remaining.
Time willing, they read their story to one other student (and visa versa). Before they begin I discuss the importance of giving some kind of affirming feedback, as this is a process: sharing their writing and their experience on the first day with someone they don’t know. I give them examples of quality responses. Rather than vague phrases, “I liked it. It was good,” I instruct them to point to specific parts of the writing that really moved them or reflect on what the story made them think about.
I collect and read the freewrites and begin the process of keeping a mental file on each student of possible research topics. Over the next week, with students’ permission, I put freewrites on the screen and have the students read it while I highlight how it demonstrates an aspect of strong writing and models different digital story topics relevant to the freewrite. When the time comes to brainstorm topics for their capstone digital story assignment, I either return the freewrites to them with suggestions for related topics written on them, or I remind students about them in person. Because they have shared their stories with each other, their partners can also notice and suggest topics that the writer may be too close to see.
The freewrite, shared reading, and feedback exercise also fosters the process of creating a sense of community in the classroom, which, in my experience, has been a vital element of transformative learning.
Note: Because the Water Seminar is writing intensive, the initial freewrite assignment serves other purposes as well, including an example of what the student is capable of writing on that day. In case of possible future plagiarism in research articles, as well as in their digital story assignment, it has been helpful to have an example of the students’ writing for comparison.
Exercise 1.2
Index cards on the first day
I ask questions of my students that yield more information about their interests by writing 3–5 questions on the board which they answer on an index card. I make this voluntary and all tend to complete it. Some questions I may ask are:
- What experiences have you had learning about water?
- When you think about water, what comes to your mind? Use descriptive words,
images, and feeling words. You can also draw or sketch what comes to mind. - What would you like to learn about water resource topics?
- Where have you traveled, and for what purpose? (for example, family vacation
or church trip). Many students have traveled with their family and have done
missions work, and these experiences have yielded topics for powerful digital
stories. - What kind of experience have you had working with photos, videos, and editing
online – for example editing photos online, making slide shows, high school
yearbook? Because the digital story involves use of technology, I usually ask
a question about prior experience. This helps me to pair a more experienced
student with one who hasn’t had as many opportunities. - Please add anything else you’d like me to know about you, or draw or
doodle here. If you are fortunate to have artistic students, you can
encourage them to create art to integrate in their digital stories, and move in
the direction of comic/graphic stories.
Exercise 1.3
Individual or small group conferences with students
During the first half of the semester I try to meet with each student one–on–one in my office or at a coffee shop. There is something about meeting students individually in a neutral, non–class environment that allows the conversation to travel to different topics, such as music, which can be relevant for the student’s choice of music in the story, or interests such as space travel, sailing, or their desire to make a difference in the world. This helps me direct students to what they are inclined to learn more about.
2. Taking photographs and videos to strengthen students’ ability to
create topic–relevant, aesthetically powerful, and culturally respectful
images
Exercise 2.1
Taking students out in the field with their cameras
This experience gives students the opportunity to practice their technical skills out in the field. In the water seminar, I take my students along the Mississippi River, which runs through our campus; shooting outside wakes up their senses to aesthetics and textures around them, which helps them to create stronger photos. Something alchemical also occurs on this field trip—an important shift from passive to active participation in their learning. The freedom and creativity to explore in this safe yet real setting is coupled with the mystery that this magic is hiding in their plain sight every day as they walk hurriedly past the Mississippi River to get to class, or as they run on the bridges as part of their exercise route. The power of making the river the classroom, of featuring it as central to their academic endeavors, participates in transforming their experience of in and out, living lab and classroom, urban and natural, mover and moved.
I often taught the water seminar in early spring; this is Minnesota mind you, so I warn them to dress for the weather. No matter how cold it is, we walk together to a pedestrian bridge over the Mississippi which faces the Minneapolis skyline and a series of bridges, locks and dams, the St. Anthony Falls, and the Guthrie Theatre, jutting over the water. It’s dizzying, the beauty, the collision of nature and urban and past, present and future.
Everywhere we look there are angles, texture, shapes, and colors, and we have not even gotten to the Big Muddy yet, with it’s dark swirling waters that inspired Mark Twain’s Adventures of Tom Sawyer, Langston Hughes’s poem, The negro speaks of rivers, and provided the poet John Berryman a place to jump to his death.
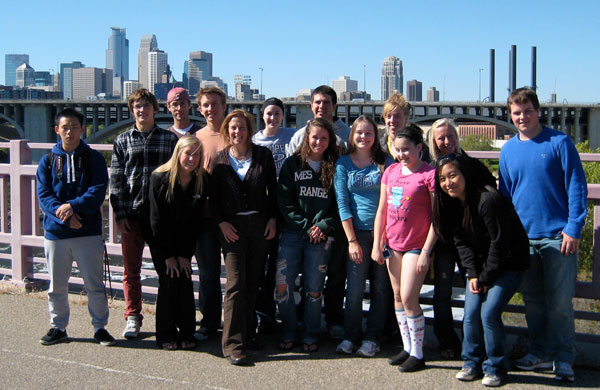
Water Seminar group photo on the Mississippi River
Then we take a group photo. Sometimes I ask a stranger to take our picture, or I drag a tripod along and ask students to figure out how to attach the camera and find the self–timing feature.
I point out possible routes for taking photos, and discuss respectful photographing of people passing by. Then I stay on the bridge, where the students pile their backpacks, and give them a clear time to return. I require partners or small groups if they are planning to explore beyond my sight. Sometimes I collect cell phone numbers as I do not want to repeat the time when three female students found their way down to the riverbank and got so caught up shooting the contrast between broken concrete and light striking water that they lost track of time. I sprinted across the railroad tracks past a row of graffitid rail cars to the river, worrying about the students but also practicing what I would say to the parents,
“Um, I’m sorry, they just got carried away…”
Exercise 2.2
Practicing uploading and editing shots and peer–sharing of knowledge to a course blog.
Once students have shot out in the field, I take them to a computer lab or our classroom with their laptops/tablets, and work with a technology assistant to teach them how to upload images and video, and to resize, edit, and share their best shots with textual descriptions to a course blog. Students select one or two of their favorite shots, which they share on the blog along with a summary of what they liked or found successful about the particular shot or video clip, and include technical info about how they took it (e.g., “I tried six times to center the concrete slab just as the duck paddled by”, or “I was concentrating on the texture of the rocks when a bald eagle flew over and I just aimed and shot”). Along with familiarizing students with technical processes, this exercise facilitates students sharing knowledge and collaborating on best practices, as well as practice sharing their work with a larger audience.
Student–to–student learning is an essential component of the transformative process.
Exercise 2.3
Artist as a guest in class.
I bring artists into class so students have the opportunity to meet them, engage with their art, ask them questions, and grow from the feedback they can offer. The following is a reflection on two artists I have brought into my classroom in the past, videographer Beth Anderson and visual artist Celeste Nelms.
Videographer Beth Anderson, from the University of Minnesota’s Institute on the Environment, spoke on how she produced her 2-4 minute videos, and also gave feedback on a student digital story from a previous seminar so students could see what she, a videographer, noticed both in terms of technique and story line.
The students had already begun the process of weaving interview clips in with still shots, music, and text, so they were all ears to what Beth had to say. Of the many insights she provided, the one I highlight here is for students to consider the audio version of their digital stories as separate from the visual shots, so that someone who was only listening to the audio could follow the story line. Beth creates transcripts of her videos and chooses her interviews so that they satisfy the core components of her story; as a writer, this kind of revision of text in order to move the story along makes good sense.
Visual artist Celeste Nelms presented on her sepia photographs involving water. Nelms’ art does not elicit a simple response nor does it yield all in one viewing. Her work is poignant, funny, and harkens from a place that stirs conflicting thoughts and feelings including nostalgia, agitation, and longing; the students were fascinated. I wanted students to struggle at levels where they would have to work hard to find words for, and then give them the space to write a reflection on their evolving responses to Nelm’s work and to connect their insights to what they’d discovered about their topic and the creation of their digital story. I also wanted to create a place where they could laugh when art was funny, and to reflect on their own repulsion or shock as arrows into cultural norms they were brought up with. Nelms is not an eco-artist, yet her work confronts viewers with what they choose to value and abandon. So few of the students had had the opportunity to talk with a working artist and they were shocked at how much work went into creating art. A kind of initiation or dawning emerged in their reflections on Nelm’s visit. Art, like science, is exacting, has tenets and rigors, all while being a creative mysterious process.
There is representational photography and there is conceptual art. There are realistic depictions of an object, and creative thoughtful play with an object that disrupts our notions of what should be, which helps us to “see it slant“ (Dickinson). Both kinds of artists can help students to foster a close gaze and a more nuanced aesthetic for their stories. Essential to students’
transformative learning is this opportunity to look closely and engage with an artist’s images, to listen to them discuss their artistic process and be able to ask them questions, to reflect on their myriad thoughts and emotions in writing, and then to share and respond with their peers.
I have students reflect on guest speakers’ visits and instruct them to articulate specifically what they learned and how it will contribute to their digital storytelling process. Reflecting on learning is also an essential part of the transformative process as it deepens the student’s own awareness of their learning and moves them further along in concretizing their knowledge.
Exercise 2.4
Attend and reflect on a public event by a photographer, photojournalist, videographer, or filmmaker.
To help students reflect on the social aspect of their image-taking as well as their digital stories, I invited New York Times photojournalist Ozier Muhammad to give a public presentation. Muhammad had just returned from Haiti and shared his post-earthquake photographs. Along with interested public, university colleagues and staff, I required my water seminar students to attend and then to write a reflection on what they learned.
Students need models of culturally respectful images, and Muhammad’s photographs honored the integrity of both the viewer and the viewed, and are a reminder of the vibrant resilience of Haitians.
When students learn with community members and colleagues, they understand that their intellectual work is part of the ongoing discourse between what we do at the university, and events that are unfolding in our backyard and across the globe.
When I asked Ozier what advice he would give to students who were using images to help educate and engage the viewer, he said, “Use your images to move the story forward.”
Exercise 2.5
Research good photographers, videographers, and artists and their work.
If you don’t have time or access to a photographer or artist, assign students to research and share photographers and images they find compelling, and how they could incorporate some aspect of the work in their image creation. Alternately, have students research techniques for creating good photographs, videography, and art. These exercises are good for a flipped or online
classroom.
A few good videos for this exercise are:
3. Cultivating visual literacy
Exercise 3.1
Cultivating visual literacy through reading and creating visual communication of academic knowledge.
As educators, we often teach in the learning style we are most comfortable with. We are educating diverse learners – some think visually, others are very linear and text–based. Take, for example, Karen, the straight–A business student who had always done well academically, but had never been challenged to communicate her knowledge in a visual way. She inspired me to think about scaffolding assignments that would not make her experience of creating a digital story akin to being thrown in a cold pool in order to learn how to swim.
In this scaffolding assignment I asked the students to read an interview with ecologist Sandra Steingraber in The Sun titled “The Good Earth?” [1] Students were asked to create a visual representation of Steingraber’s main points. As they read the interview, they were expected to take marginal notes of when Steingraber connected her knowledge about environmental issues related to cancer to specific items such as baby bottles, house sparrows, and bottled water, as well as to take note of when she discussed concepts that could be represented visually, such as being adopted, or a fetus growing inside a woman’s womb.
The students’ task was to communicate Steingraber’s points using images to represent those objects and concepts. They could sketch the images or use photos and illustrations from books, magazines, or online sources (I reminded them to track the citation of sources). On a separate page they were to pair their image with a brief summary of the points Steingraber was making related to that object (1–3 sentences in bullet points or paragraph). They practiced paraphrasing Steingraber’s points in their own words, but when needed, took care to put quotes around Steingraber’s word choice or sentences. (This assignment is also good practice for correct paraphrasing which is necessary for a digital story.)
Once students completed all of their images and brief summaries, they were to move the images around and shape them into a larger picture that was relevant to Steingraber’s messages about the connection between man–made chemicals and materials and the rise in cancer rates: a kaleidoscope, river, globe, human, circle—there were many possibilities.
I assessed this scaffolding assignment on the content of their summaries, as well as the meaningfulness and appeal of the visual images, text, and larger image. The following two projects are successful because they are composed of relevant discrete images, and are also arranged to create a larger object that is both visually relevant and engaging.
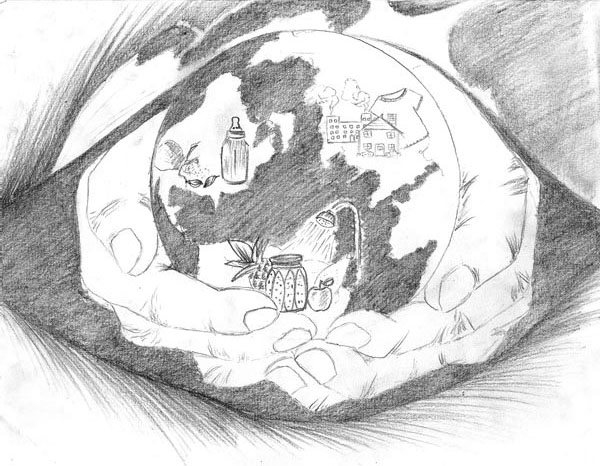
Drawing by Fee Long Moua

Collage by Angie Offerman
Exercise 3.2
Fostering visual literacy through practicing a close reading of an image.
This exercise helps students to learn how to do a close reading of the visual text that is an image. In essence, you are helping students draw a parallel between doing a close reading of a literary text and helping them become familiar with the skills necessary to closely experience and understand the power of the image. I chose photographer Gordon Ball’s “Cadets read Howl” as an example because from the moment I first saw it postcard size on a professor’s door, years ago, I stopped, stared, and in a sense fell into the spell of the photo, into the juxtaposition of crisp clean-cut military students earnestly grappling with Allen Ginsberg’s searing poem Howl. In that moment I felt many things, including a kind of longing for how visual artists can
communicate paradox in an efficient manner, as opposed to the tools of my trade, arranging words into sentences into paragraphs to reveal a paradoxical experience. I also felt hope that a teacher at a military academy would assign Howl, and a sense of wonder that our world can contain such vastly differing realities in safe learning spaces.
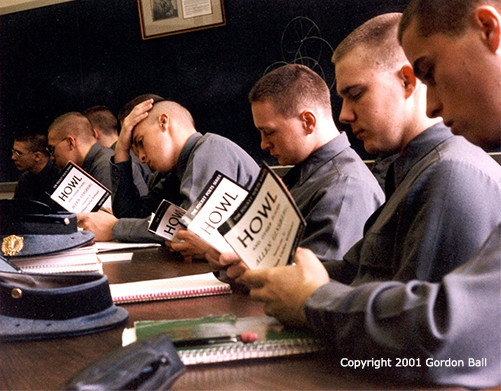
Photo © Gordon Ball
Once you’ve chosen the relevant painting, photograph, or drawing, if possible, project the image, and have students have access to digital or print copies at their desks.
1) Ask the students to do a close reading of the image. You can have them work in pairs or small groups, or do a large class exercise. Assign each section of the class (or members of a small group) a different task that helps them study the image. Each group takes notes, discusses, and then should be prepared to present their findings. Encourage the students to pair their insights with specific details in the photograph and to use vivid, precise language to present their findings.
Group 1 is responsible for focusing on the design or layout of the photograph. Discuss foreground, background, lighting and its effect on viewer. What is the position of Ball when he took this shot? How does that impact what we see? What patterns and shapes do you notice?
Group two focuses on the mood of the photograph. How would you describe the looks on the cadet’s faces? Consider the colors, the way the cadets are holding the books and sitting in their seats. Expand the photo and look at the cadets in the background of the picture. What is going on there and how does that contribute to the feeling of the photo?
The third group is responsible for researching relevant details of the image in order to help the class create a historical, political, and cultural context for the photograph. In this case, they could begin with the title, date, the photographer’s bio and any relevant information about the photograph. What information can be found on the academy the cadets are a part of?
Research Allen Ginsberg’s bio and poem Howl. Read excerpts.
2) Each group presents their findings. Discuss. Connect their ability to analyze the image to their choices of images for their digital stories. If an image is a visual text, what does that mean for their stories?
3) If you have time and the inclination, you can turn off the projector, ask the students to turn over or off their copies of the photograph, and have them draw the image from memory. This reinforces their kinetic ways of knowing, as well as their subconscious and conscious understanding of the role of perspective, shapes, colors, and light source in impacting our understanding.
4. Analyzing the elements of a digital story as a class
Exercise 4.1
PSA/digital story review
Choose a digital story that features content you are addressing, and divide your class into groups of 3 or 4 to analyze different elements of the story from the list below.
As the class watches the digital story, each person should jot down notes on their respective element. Allow time at the end for group members to discuss their notes, and then have them share their findings.
Here are elements, and corresponding questions, I have students focus on:
Content
- Summarize what new things you learned about the topic.
- What questions do you still have about the content?
Music
- Note every time there is a shift in music.
- Describe the different kinds of music used and reflect on the effect of the
music on your learning. - Are there places where the music distracts or enhances your understanding of
the topic? - Is the music too loud, too soft, or just right?
- Is the music cited accurately?
Research Integration
- Note every quote and citation.
- Note when a statistic is used and if it is cited in the scene or at the end
of the story. - Did the creator of the story employ a skillful integration of research or did
the research seem dropped in? - Is there any research you wish you had more of? Was there too much research
in places? - Were there places where you wondered if the research was a correct paraphrase
or possible plagiarism?
Images
- How many images were used?
- Were all the images photographs?
- Were there any charts or art?
- Gather your thoughts about the effect of the images. Were any too obvious,
irrelevant, culturally disrespectful, or of poor quality?
Role of narrator
- How would you describe the narrator (first person, invisible)?
- Was the narrator present in the story? Did they use a voiceover?
- Did you feel a strong presence of the narrator, or did the narrator choose to
stay removed from the story? - What are your thoughts on the effect of the narrator in this story?
Arc of story
The arc of a story is an important and difficult concept to facilitate when teaching the digital story assignment. As a creative writer, I try to bring the awareness of a story’s movement from the beginning to its end, and the importance of the narrator in ushering the viewer into the world of the story. Before I do this exercise I briefly go over the traditional action of a story (see
diagram). A good resource on narrative structure in writing that integrates digital media is David Reinhart of the University of Wisconsin Whitewater. [2]
- How does the arc of the video story you are watching compare with the tradition short story arc? Note: there are many ways to shape a story and I am not encouraging students to follow the traditional arc. More, I want them to become aware of, and to choose the arc of their digital story.
- Did you find that the progression of the story was effective? If so, why? If not, how could they have organized the story in a more powerful way?
Emotional appeal
- What emotions rise up in you during this story? Point to specific scenes and places where you felt them.
- Were there places where you felt emotionally manipulated? Where you weren’t sure what you were supposed to feel?
Ethos, Pathos, Logos
Sometimes it is helpful to assess the rhetorical use of ethos (gaining credibility, trust), pathos (appealing to emotions to engage the viewer), and logos (the use of logic and evidence to substantiate claims) in the digital story.

Logos, Ethos, Pathos Diagram
Takeaway
- What do you come away with after watching this story? What do you feel?
Anger? Hopeless? Inspired? A call to action? - What do you think the creator of the story wants you to take from this story?
What would the creator want you to do?
Variations on this exercise
- Compare and contrast two digital stories about the same topic or choose a
short film about your subject. Apply analysis to that film. - This exercise also works well with the University of Houston’s modified
10 elements of educational digital stories. 3 source: Educational Uses of Digital Storytelling
website
Exercise 4.2
Select a story to share and analyze
For flipped and online classes, or as a homework assignment, assign students to find a short informational film, PSA, or documentary on a relevant subject. Create a forum where students submit a summary/analysis of the film, which includes the producer, source, brief synopsis, and analysis on both form and content. Each student must also thoughtfully respond to two classmates’ submissions.
5. Getting into the music
Exercise 5.1
PSA/digital story review
Having students analyze the impact of the music in PSAs or other digital stories is one way to help them become more nuanced in their own use of music, and pointing them to good models is another. Music is also the most thorny issue in terms of copyright (see the “Working through Fair Use and Copyright issues in reference to research, music, images, and video clips…” section of this chapter).
6. Making a two–minute movie
Exercise 6.1
Making and sharing two–minute movies in class or in an online forum
I always use this scaffolding assignment. Each student makes a two–minute (or shorter) movie which incorporates at least one image, one insight about water, titles, transitions, motion and voiceover: in essence, all the elements of a digital story, but in a low–stakes, fun assignment. Some choose to use this assignment to begin to address their digital story topic while others film a friend jumping through puddles or dogs drinking water at an animal shelter.
Students make their movies in iMovie, Windows Moviemaker, or another program of their choice. If there is time in class we have a mini “premiere” of the two–minute movies and clap after each one. In a hybrid or online course I have students post links to their movies and require them to comment on at least two other movies.
Here is an examples of a student’s two–minute movies from this exercise:
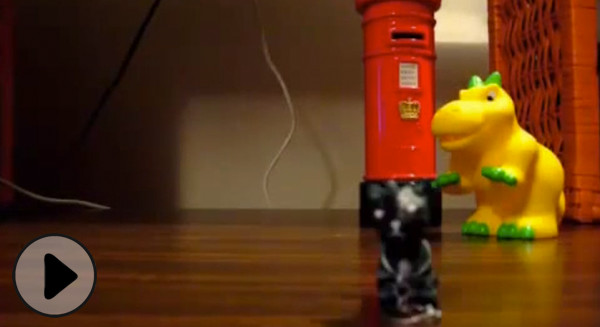
A digital story by Cece, “Water Dino Saves the Day”
7. Analyzing audience
Exercise 7.1
Find the Audience
Have students find examples of sources that address the same topic they have chosen but targeted to different audiences. For example, a children’s book on water issues compared to a PBS documentary. Students bring in the sources, give a brief presentation on the strategies, and then make connections with how they will shape their story to their chosen audience.
8. Working through Fair Use and Copyright issues in reference to research,
music, images, and video clips
Exercise 8.1
Review of the student’s digital story transcript
Require a transcript of the complete draft of the student’s digital story assignment. The process of writing down all the text not only causes students to think through the research integration, but also helps them to assess their story removed from the lure of images. The challenge with the transcript is it is time–consuming for them to create, and time–intensive for you, the
teacher, to assess and respond to.
9. Interviewing
Exercise 9.1
Practicing the technology – In class activity where students conduct and film brief interviews with each other
This is the time to break out the equipment that you have access to: tripods, external mics, video cameras, smart phones, iPads. Pair up students and have them interview each other about something they know a lot about. It could be a completely unrelated subject matter, such as what their favorite late night snack is, or telling the story behind one of their tattoos. Have them time the interview and, if possible, give them time to compare two different ways of interviewing, for example a smart phone with an iStabilizer (mini tripod) and with/without an
external mic.
Reverse roles. Once both partners have interviewed and been interviewed, upload the footage to the computer or tablet they will be editing on. Conclude the class period by having them share what they discovered. If possible, have them project a few seconds of the interview. This step is not only fun, but gives them a glimpse of the rendering and projecting processes.
Audio is by far the most challenging aspect of these interviews. Students shoot a great picture, ask excellent questions and yield rich responses, but what good is it if you can’t hear it, or if the audio quality is so poor that the viewer must strain to understand?
Exercise 9.2
Preparing effective questions for real interview
I encourage students to begin their interviews with an easy question, such as how long the person has worked for the organization, or taught at the school, and to conclude with an open–ended question such as “Is there anything elseyou’d like people to know about….?”
Suggestions for helping students prepare for real interviews:
- Check the camera by videotaping for a few seconds, then playing it back
before they begin the formal interview. - Make sure the cameras are charged and there are extra memory cards and
batteries with them. - Have a back up plan: a digital voice recorder or a notebook and pen.
- Remember to bring the permission form and have the interviewee read and sign
it before conducting the interview (when relevant). - Require students to follow up interviews with a thank you note or email that
includes their contact information.
10. Narrating
Exercise 10.1
View and analyze the role of narrator in two different digital stories, preferably addressing similar topics
Students write up a comparison/contrast and then articulate their vision for their own presence in their digital stories. This exercise can be done collectively as a class, in a flipped classroom, or outside of class. The following is an example of a subtle narrator presence in a digital story:
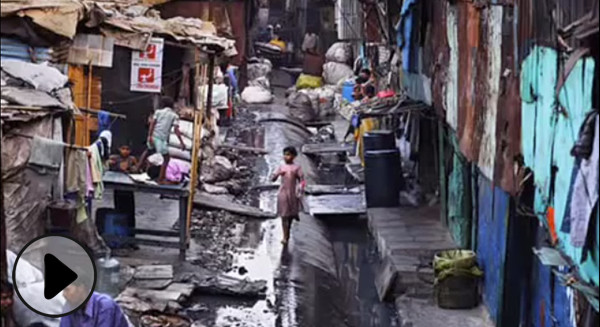
A digital story by Claire Kurschner, “Water, Women, and Microfinance”
11. Storyboarding
Exercise 11.1
Creating storyboards
A storyboard is a visual map, a series of panels that briefly describe the shots of a digital story. The storyboard accounts for what images will be paired with which text, audio, and the sequence of the shots and information.
When I first required storyboards, students created them by hand or by using text boxes in a Microsoft Word document. Dozens of apps and programs have emerged since, and continue to proliferate. Popplet is a favorite among students and me. Drafting out the discreet scenes by hand is still an effective way to help students connect and anticipate elements of their story, and to track the progress of their narrative arc.
12. Online peer review of complete draft of digital story
Exercise 12.1
Peer review of stories in rough draft form to gain feedback and learn how other students are organizing their stories
The most effective method I’ve used to help students create strong finished projects in class is to require a complete draft of the digital story with enough time for peers and me to give feedback via an online annotating tool, such as the free University of Minnesota–developed VideoANT. To reinforce the importance of revising the draft, build points into your rubric or evaluation for this specific step such as:
- Suggestions for providing helpful feedback for students on complete drafts of
their stories. - Review of digital story draft.

Feedback/Errata